
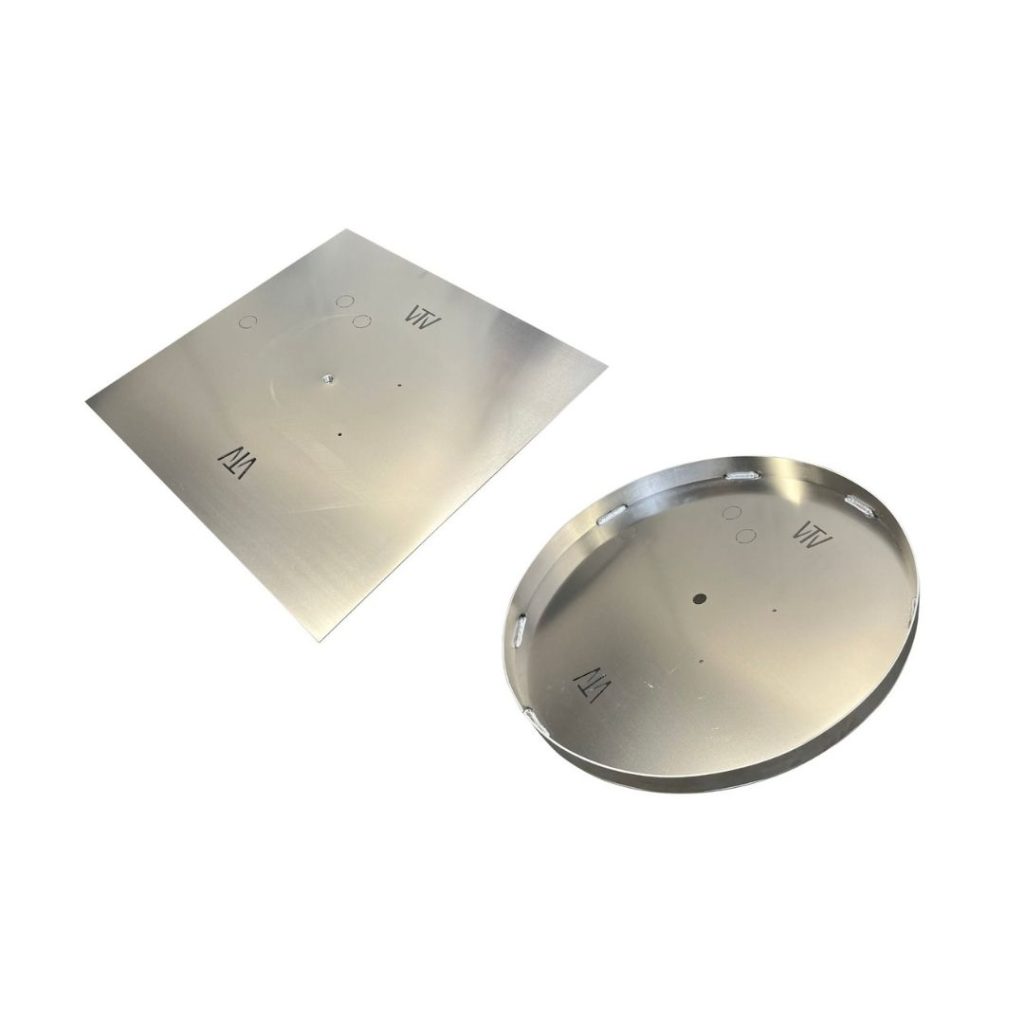
metal plate/pan from Montana Fire Pits

Round or Square Aluminum Fire Pit Plates and Pans – 1/8″ Thickness

$0.00

These are our 1/8" solid aluminum plates and pans.

Guaranteed to stand up to any amount of burn media you can stack on top of your burner.

Free shipping on plates and pans under 36" - Anything 36" or larger must be crated and shipped as freight, therefore price includes freight on all plates and pans 36" and larger.

Estimated ship date: October 23, 2026Shipping - What to Expect

Add to cart
  • Product Overview

    The industry standard for luxury and performance

    The Purpose

    The main purpose of the plate or pan is to hold in the media (lava rock, glass, etc). It also acts like the hood of a car, in that it can be lifted up and out in order to access the gas line or key valve underneath.

    What’s it made of?

    • Aluminum

    Is it ALWAYS necessary?

    • No, in some cases a plate is not necessary
    • You may decide to fill up the space with some gravel or lava rock. This will make installation and maintenance a bit more complicated.

    Attaching the Burner

    Does it attach to the burner?

    • In most cases, yes
      • When you order a package from us, it will come with a threaded piece welded on to the plate/pan
      • The burner screws onto it
      • It’s very simple to remove or attach the burner (righty-tighty, lefty-loosy… make sure to re-apply pipe dope/tape!)
    • It’s not required that the burner attaches to the plate/pan. You can set the burner directly on it. This will reduce the height of the burner by 3/4″. This might be beneficial if you want to cover your fire feature with a flat cover

    Plate Vs. Pan Vs. Drop-in

    Plates (No Sidewalls)

    • Appropriate for most builds
    • Sidewalls are not necessary when the burner is in the common position- recessed 4-5″ below the finished top
    • Place stacked cinder blocks, bricks, or pavers under the plate. This makes for a simple and sturdy plate mount

    Pans (2″ or 3″ Sidewalls)

    • If your top cap encroaches into your opening, you may want a pan instead of a plate (since the pan has to be smaller than the smallest part of the inside diameter)
    • These just work better on some builds. We take it case by case

    Drop-In Pans (2″ or 3″ Sidewalls + 1″ Lip)

    • If you want metal showing above the opening, that sort of ‘ties it all together’, you may want a drop in pan
    • Sometimes necessary if you plan on building a portable fire feature and aren’t able to stack up blocks under the plate
    • Drop-in pans are available as a custom order – CLICK HERE

    Installation Tips

    There are many methods to mount a plate/pan inside your fire feature. We’re just going to tell you our favorite way to do things because… well, it has worked well so far! With that being said, these methods may not work in all situations, so put your problem-solving hat on and get creative.

    *Complete & RTF Systems:  you won’t need to worry about plate/pan mounting; they’re designed for simplicity

    Mounting the Plate/Pan

    • Consider stacking up cinder blocks, bricks, or pavers inside the fire feature cavity
    • Place the plate/pan directly on the blocks
    • Adjust the block height by either adding some fill, or by digging underneath
    • Most commonly, plates/pans are mounted 3-5″ below the finished top of the fire feature

    Plate/Pan Depth

    • 4-5″ below the finished top is recommended
    • Recessing it deeper may make the fire seem smaller, and you won’t see the media as well
    • Recessing it to be more shallow can give it a “proud” look; where all the parts stick up high and make a statement. Though you may have to ‘mound’ the fire media up higher in order to cover the jets. It’s not a bad look, but you won’t be able to use a flat metal cover if that’s a goal.
    • The depth at which the plate sits is really up to you. Keep in mind, the burner sits 3″ high from plate to the tip of the jet

    My Plate is Too Big/Small

    If your fire feature is already built and you can’t use a standard sized plate, you have a few options:

    Cut your plate to size on-site

      • Use a jig-saw with metal blade, or a grinder wheel with cutoff
      • It’s 3/16″ aluminum and your cut doesn’t need to look pretty

    Make your plate bigger

      • Use concrete board to extend the size of the plate
      • Watch THIS VIDEO to get an idea

    Order a Custom Size

    *TIP: Give yourself about 1/2″ of space around the plate so that it’s easy to insert into the fire feature opening


    Plate is Too Small


    Cutting the Plate


    Depth of Plate/Burner


    Installing the Plate

    More on Youtube

    • Forged in Montana

      Hand-welded to order in Bigfork by the same team that has built fire features for over a decade.

    • Industrial-grade materials

      Heavy-gauge American steel and all-brass burner systems rated for continuous high heat.

    • The perfectionist standard

      Every weld, finish, and flame is inspected and signed off before it ships.

    • Real human support

      Speak to people who know the product, before you buy and long after it is installed.

  • Item Details
    Vendor
    Warming Trends
  • Care

    Your fire feature is built from heavy-gauge steel and finished to last through hard weather, and a little routine care keeps it looking its best for years.

    • Everyday cleaning: Wipe painted and powder-coated surfaces with a soft cloth, warm water, and mild dish soap. Rinse, then dry with a clean towel. Avoid abrasive pads and harsh solvents, which can dull the finish.
    • Burner and pan: Keep the burner ports and the pan clear of ash, debris, and stray media so the flame stays even. A soft brush and a dry cloth are usually all you need.
    • Seasoning raw and Corten steel: Raw steel and Corten develop a protective patina as they weather. Rinse off loose surface rust, let the metal dry, and allow the finish to keep maturing. Do not seal it unless you want to hold the current color.
    • Use the cover: Fit the cover whenever the piece is not in use. It keeps rain, snow, and grit out of the burner and protects the finish between gatherings.
    • Off-season storage: Before a long cold spell, clean the unit, make sure it is fully dry, and cover it. Store loose media and the burner pan somewhere dry if you can. Empty and disconnect propane tanks, and keep them outside and upright.

    Gray weathering, light surface rust on raw steel, and small color shifts over time are normal for an outdoor steel finish, not defects.

  • Shipping

    Every order ships by freight carrier on a pallet. Because these pieces are large and heavy, they travel as curbside freight rather than white-glove delivery, so the driver brings the shipment to the curb or the end of your driveway. Plan to have help on hand, or ask us in advance about a liftgate if you do not have a forklift or loading dock.

    • Lead times: Timing varies by product. In-stock items usually leave the warehouse within a few business days, while made-to-order and custom pieces take longer to build. We confirm the current lead time for your specific configuration before your order is finalized.
    • Tracking: Once your order ships, we send tracking details, and the freight carrier schedules a delivery window with you.
    • Inspect on arrival: Please inspect the packaging and the product when it arrives, and note any visible shipping damage on the delivery receipt before you sign. Let us know right away so we can make it right.

    Shipping cost and options depend on the product, your location, and any accessories, and they are shown at checkout or confirmed with your quote.

  • Guides & Installation

    Installation should be carried out by a qualified professional, and any gas work must be completed by a licensed installer in line with local code. Confirm gas type, line sizing, and supply pressure before installation day.

    Product guides, spec sheets, and cut sheets are provided with your order and are available on request. Contact our team for the installation manual and documentation for your specific model.

  • Warranty & Returns

    We stand behind how these pieces are built. Every product is inspected before it leaves the workshop, and we work with you directly if something is not right.

    • Workmanship: Our products are warranted against defects in materials and workmanship under normal residential use. Coverage, terms, and any exclusions depend on the product and its components.
    • What is not covered: Normal weathering, patina, surface rust on raw and Corten steel, color change over time, and damage from misuse, alteration, or improper installation are not considered defects.
    • Returns: Made-to-order and custom configurations are built specifically for you. If you need to return or exchange an item, contact us first so we can walk through your options and any conditions that apply.
    • Freight damage: Damage in transit is handled separately from the warranty. Note it on the delivery receipt and contact us promptly so we can file a claim and arrange a fix.

    For the exact warranty period, coverage by product line, and current return terms, please contact our team and we will confirm the details for your order.