10 Great Fire Pit Party Ideas

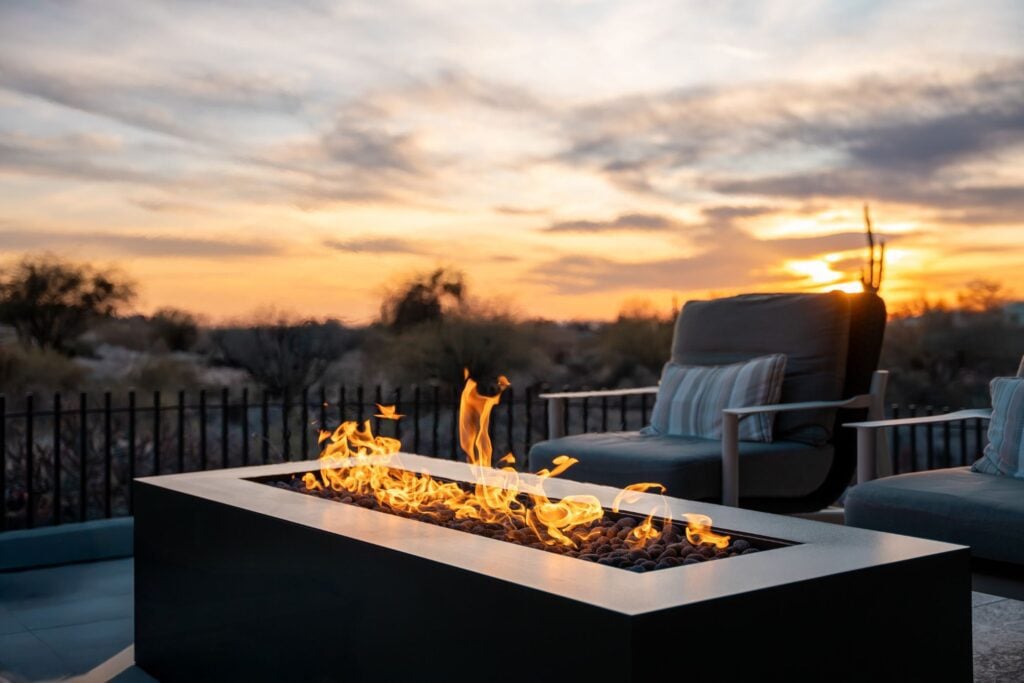
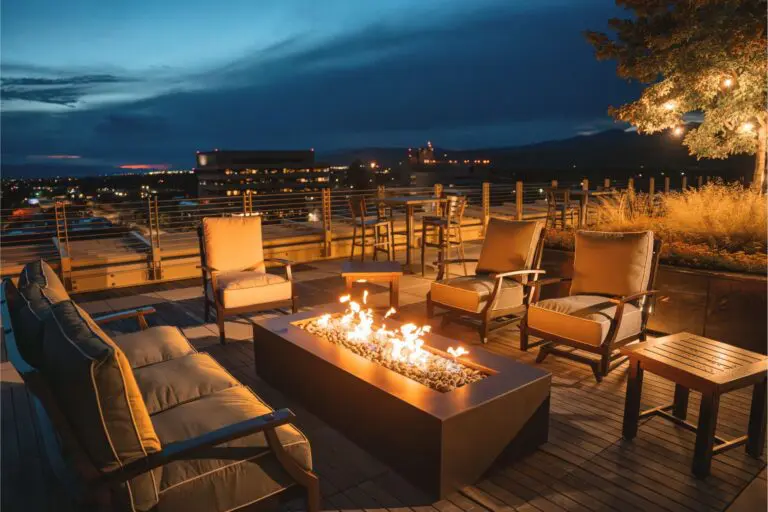
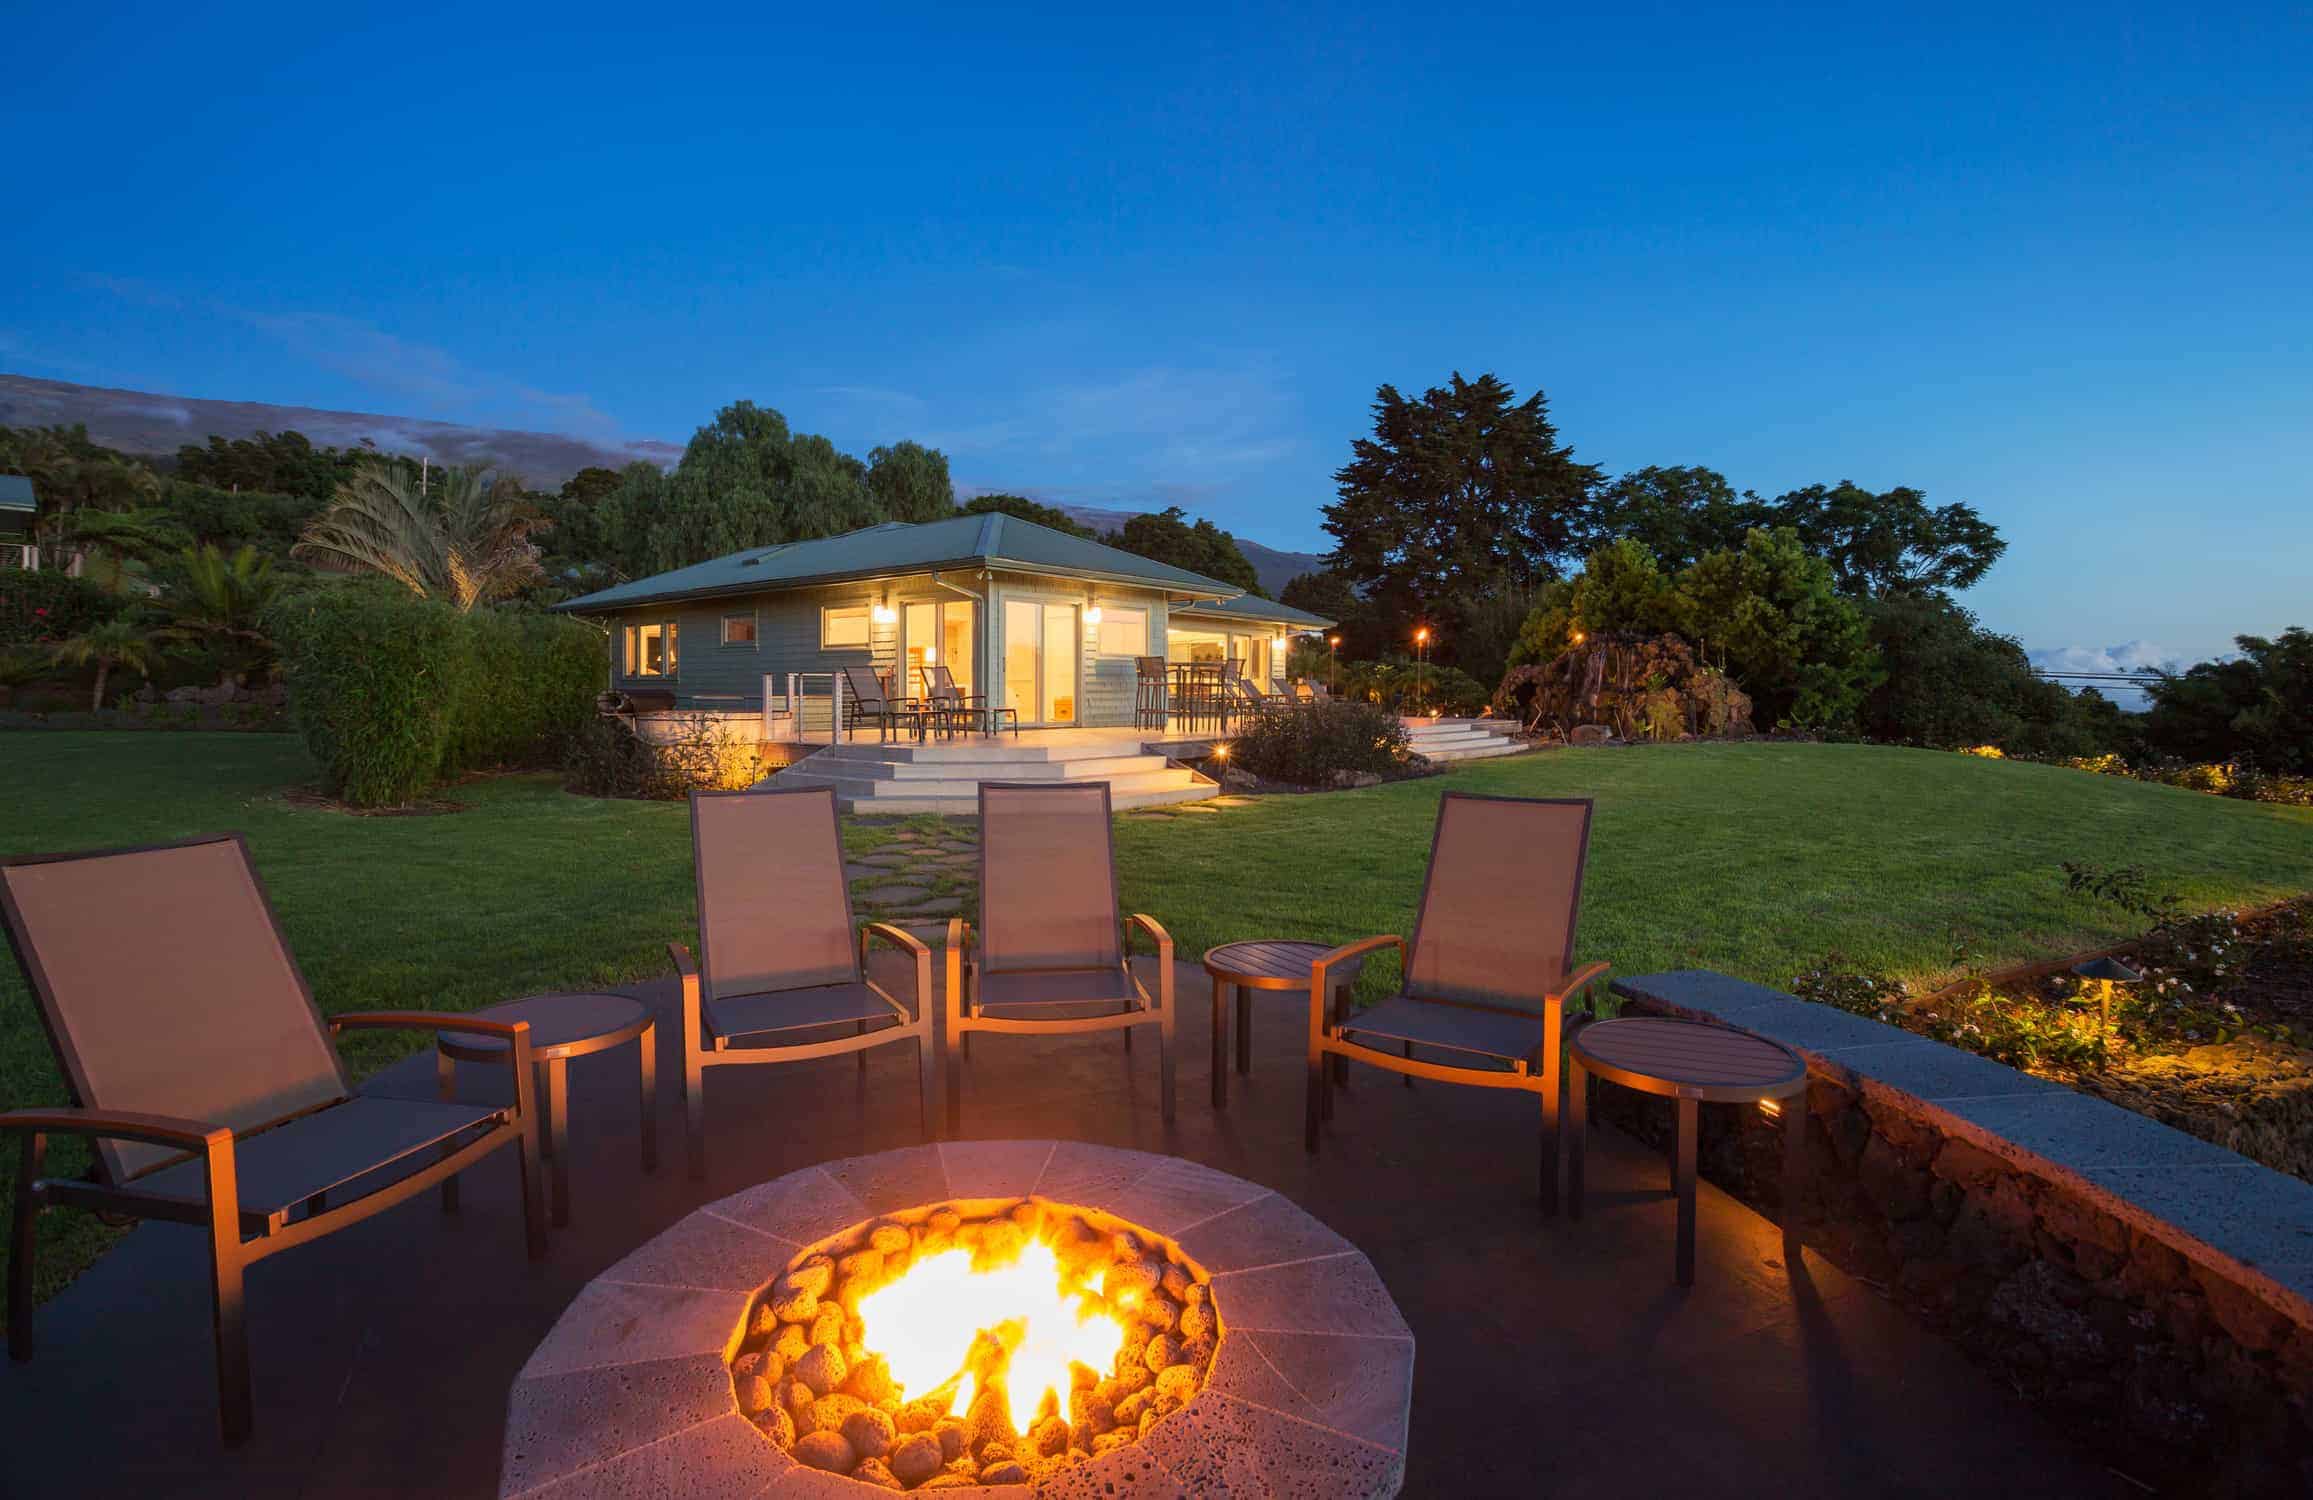
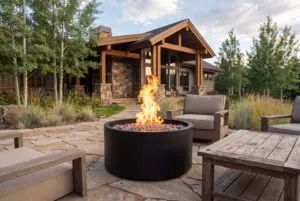
Entertaining your company in the comfort of your own yard has never been easier and planning your outdoor get-togethers around a fire pit is equal parts fun and rewarding. To get you started, we’ve put together a list of enjoyable activities to try out with friends at your next fire pit party. So prepare your patio furniture, string up some lights, and get ready to make memories.

1. S’mores Party

S'mores Fire Pit Parties

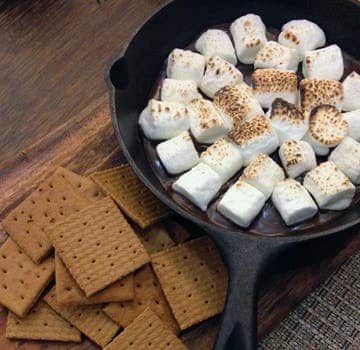
No outdoor fire pit get-together is complete without s’mores! Friends and family of all ages will love gathering around the fire to enjoy the gooey goodness of toasted marshmallows and melted chocolate. Keep it classic with the original recipe or get creative by providing your guests with a variety of ingredients with which to assemble their own creations.

What You Will Need

The Essentials

  • Marshmallows
  • Graham Crackers
  • Chocolate
  • Skewers
  • A Buffet Style Ingredient Bar
  • Wet Wipes

The Extras

  • Ghirardelli Mint Chocolate Squares
  • Ghirardelli Sea Salt Caramel Squares
  • Bacon
  • Chocolate Graham Crackers
  • Peanut Butter
  • Nutella
  • Raspberry Preserves
  • Strawberry Slices
  • Banana Slices

Displaying your ingredients on a buffet style bar will give you the opportunity to liven up your party with the decorations of your choice. Add a touch of color with a lovely tablecloth and an assortment of bright bowls, or keep it simple and rustic with a wooden table and glass jars. Get extra creative by adding a chalkboard with fun recipes for your guests to try. Once your table is arranged, provide your guests with their own skewers.

Roasting marshmallows over an open flame can be potentially dangerous, so we recommend keeping your party safe and kid-friendly by using extendable skewers like these. Finally, for a hassle-free cleanup be sure to stock your s’mores station with wet wipes.  

2. Game Night

Outdoor Game Night

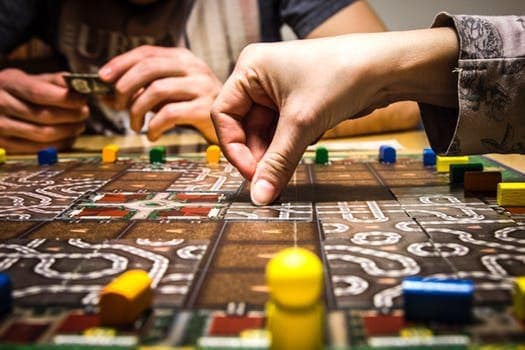
Encourage some healthy competition among friends with an entertaining game night. Keep things simple by sticking with easy group activities like charades or the name game, test your guests’ knowledge with a trivia night theme, sharpen your communication skills with Slip of the Tongue, or even cater to an adult crowd with Cards Against Humanity. Add to the fun, encourage participation, and raise the stakes by offering prizes.

What You Will Need

  • Game Selections
  • Chalkboard/Whiteboard
  • Prizes
  • Snacks/Refreshments

Keep the competitive spirit alive by using a whiteboard or chalkboard to keep score. Provide your guests with a variety of games and prizes to choose from. If shopping for prizes proves to be a hassle, feel free to ask your guests to arrive with an item of their choice to donate. A few good suggestions include bottles of wine, gift cards, candles, books, etc.

Of course, no good fire pit party is complete without snacks and refreshments! Whether you choose a potluck-style spread or to whip up some of your own favorite recipes, be sure to include a self-serve appetizer bar and a well-stocked cooler.

3. Wine Tasting Party

Wine Tasting at a Fire Pit Party

Bring the elegance of a fine dining experience to your own backyard by hosting a wine tasting party.  Your friends are sure to be impressed by the opportunity to sample a plethora of wine selections and discuss their observations with others. Add a touch of class to your fire pit get together with just a bit of planning and shopping. Unlike a dinner party, this event requires very little preparation and cleanup allowing you more time to converse and enjoy your company.

What You Will Need

The Essentials

  • Identical Wine Glasses
  • Water Pitcher/Glasses
  • Corkscrew
  • 4-6 Wine Selections
  • Napkins
  • Spittoons
  • Wine Information Printout

The Extras

  • Cheese
  • Fresh Fruit
  • Bread

Before your guests arrive, we recommend setting each place at your table with the following: a napkin, glasses for each wine, a glass of water, a personal spittoon, and a printout with information about each bottle of wine you have selected. Be sure to limit your choices to 4-6 selections so as not to overwhelm the palate. If you wish, you may select a theme such as wines from a specific region or vineyard.

For added fun, you could remove the labels and see if your guests can match the wine flavor to the description cards.

Once your company has settled in, lead them through the tasting starting with white wine and ending with red. If you’re new to wine tasting, be sure to check out these helpful guidelines on proper tasting techniques from Wine Enthusiast. You may choose to provide your guests with a notepad and pen to record their observations or simply encourage a group discussion.

4. Outdoor Movie Night

Outdoor Movie Night at the Fire Pit Party

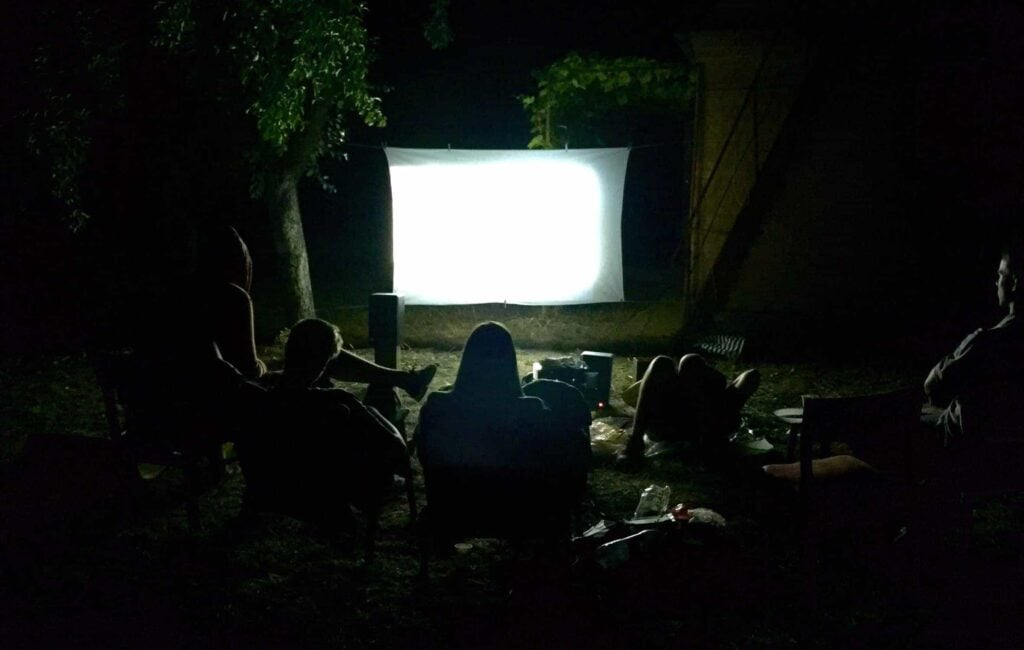
Enjoy the nostalgic feeling of a drive-in movie by transforming your yard into a cozy outdoor theatre. Assembling your backyard cinema may be easier than you think and it will provide guests of all ages with a unique, memorable viewing experience. Stick with a family-friendly Disney theme or add a hint of exhilaration with a marathon of classic horror films.

What You Will Need

The Essentials

  • Projector
  • White Sheet
  • Media Player/Laptop
  • Speaker

The Extras

  • Popcorn/Toppings
  • Beverages
  • Candy

If you don’t already own a projector, you may decide to purchase the model of your choice or build your own DIY Projector with a Smartphone. Start with a quick and easy setup by hanging a white sheet from a clothesline between trees. Next, assemble your media station with a laptop, speaker, and a projector. For seating, you can provide folding chairs or have your guests sprawl out on the lawn with blankets and cushions. To add some extra magic, send out movie ticket invitations and arrange a self-serve popcorn and candy bar. Make sure to keep your guests safe by using string lights to illuminate pathways. For cooler nights, add blankets and pillows and be sure to keep the fire pit lit.

5. Kebab Party

Kebabs

Host a backyard barbecue with a twist by throwing a kebab party. Relatively easy to prepare and loads of fun for your guests to assemble, kebabs are a fun alternative to the traditional menu of hotdogs and burgers. Let your friends get creative or lend them a helping hand by providing a menu with your own suggestions. Or if you’d like, spice things up by selecting ingredients that correspond with a specific theme.

What You Will Need

  • Vegetables/Meat/Seafood
  • Metal Skewers
  • Napkins/Plates
  • Beverages

There are many different ways to throw a kebab party. Ensure a smooth celebration by marinating your meats and slicing your vegetables ahead of time. Throw together an ingredient bar complete with herbs and seasonings for your friends to assemble and cook their own skewers, or simply designate a chef and collect orders from each guest. If you’re looking for some fun recipes to try, check out these kebab recipes from Food Network. 

6. Backyard Camping

Backyard tent camping

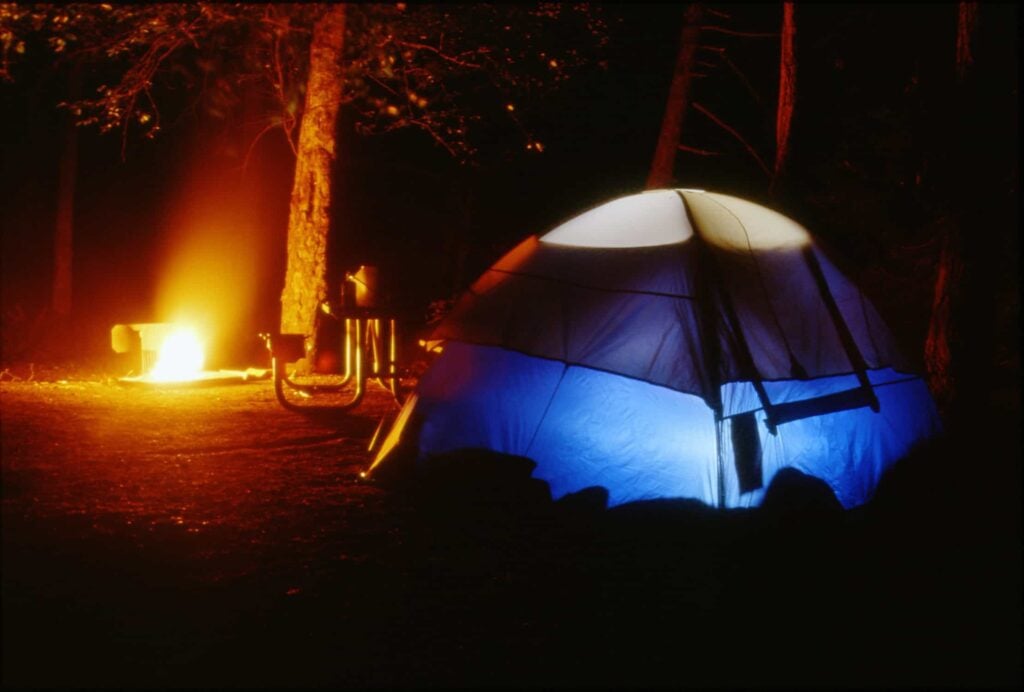
Sure, camping makes a great summer outing, but why not gather your friends and family for a campout in the convenience of your own backyard? This party puts an adventurous spin on a traditional slumber party, and who can deny that a bathroom within walking distance adds a certain sense of luxury generally not afforded by other camping trips? Gas fire pits offer the feel of a campground without the hassle of chopping wood or the fire restrictions that are so common in the summer. Check your weather app, prepare your bug spray, and get ready for a fun-filled night outdoors.

What You Will Need

  • Tents
  • Sleeping Bags
  • Pillows

Many of the party ideas within this list can be accompanied by a backyard campout. The best part about backyard camping is its simplicity. The essential items required for this activity will likely be provided by your guests, and setup is a breeze. Once the tents are pitched and sleeping arrangements are made, you and your guests are free to relax around the fire with hot chocolate.

7. Karaoke Night

Show off your musical talent with a karaoke night. Your friends and loved ones will surely enjoy the chance to sing along with their favorite tune! Karaoke provides an ideal icebreaking get together that is just as much fun for performers as for spectators.

What You Will Need

  • Karaoke Machine

or

  • Karaoke Phone App

A karaoke party is among the easiest to plan. Whether you choose to use a karaoke machine or simply an app, your backyard will become an area of entertainment and delight. For a stage, you may assemble your guests around an elevated area such as a deck, or simply designate an area on the lawn and position chairs or blankets accordingly. If you are hosting the party at night, be sure to include a spotlight for performers. Take your karaoke night to the next level by choosing a theme such as 80’s music and encouraging your guests to arrive in costume.

8. Ghost Story Party

Ghost Stories

Add some spooky vibes to your fire pit party by planning a ghost story night. Fall is the perfect time to organize a Halloween style celebration by gathering around the warmth of a fire and swapping classic horror tales and personal favorites. Ghost story parties are hassle-free and easy to plan, and they provide hours of freaky fun for the whole family.

What You Will Need

  • Ghost Stories
  • Chilling Music
  • Spooky Decorations

Sure, you don’t necessarily need to decorate for your ghost story party, but where’s the fun in that? Break out those Halloween decorations, tack up some fake spider webs, and add to the bone-chilling atmosphere with dry ice. Play a spooky soundtrack on a phone or small speaker to enhance the entire experience. Take turns reciting memorized tales or terror, or find some inspiration by reading from a collection of short stories such as A Dark Collection: 12 Scary Stories.

9. Stargazing Party

Star Gazing

You don’t have to possess an extensive knowledge of astronomy to enjoy the sense of wonder that a stargazing party can provide. There is truly no feeling that quite compares to the serenity of staring into the vast expanse of the night sky. This cozy activity is a delight to share with others, so invite some friends, spread out in the yard, and take a moment to appreciate the beauty.

What You Will Need

  • Blankets/Cushions
  • Constellation Maps
  • Telescope/Binoculars

All you really need for your stargazing party is an area that allows for an unobstructed view of the sky. If you have or are planning to buy your own telescope, you may choose to set it up for a close up viewing experience, otherwise, a set of binoculars are an excellent alternative. There are many constellation books and maps to choose from, or you can embrace the miracle of modern technology by taking advantage of the numerous apps available on your phone or tablet. Take your lounging space to the next level by filling inflatable rafts with blankets and pillows.

10 Scotch and Cigar Night

Whiskey and Cigar

Nothing says luxury quite like pairing your favorite scotch with a cigar that compliments its taste. Enjoy a night of exquisite entertainment and conversation by the ambiance of the fire. Offer a selection of your own desired spirits and cigars, or invite your company to share their own chosen pairings. 

What You Will Need

  • Scotch Selections
  • Proper Glassware
  • Table Crackers
  • Cigar Selections
  • Ashtrays
  • Guillotine Cutter

The art of scotch and cigar pairing is often a matter of personal preference and palate. As a general rule of thumb, create pleasing combinations by matching the body of the cigar to the body of your chosen beverage for flavors that do not overpower, but rather complement each other. For recommendations, you may check out this article from Forbes. Provide your tasting companions with a variety, either region-specific or from a single distillery. Reserve time to engage in a lively discussion at the end.

If you don’t already have a fire pit to entertain guests, be sure to check out our full selection of industry leading outdoor gas fire pits and also check out our helpful fire pit guide. Lots of helpful information for those who are new to the sport!

Party on fire pit people!!!

Your’s Truly,
Jonathan Howie

(833) 228-5244

Jonathan Howie

More to explorer

Which Gas Fire Pit Media Is Right for You?

Which Gas Fire Pit Media Is Right for You?

Whether you love to entertain guests or just enjoy outdoor spaces, a fire pit is essential. If yours is a gas pit, here’s some advice on your choice of media.

1 thought on “10 Great Fire Pit Party Ideas”

  1. Lots of awesome ideas! I’ve done an Octoberfest for years with carving pumpkins, donuts on strings, face painting, caramel apples, and the backyard movie, and of course lots of yummy food and a fire pit we built ourselves. Since moving down south we started a Martini tasting and brought it out to the fire table this year. Can’t wait to try more fun things! Thanks

Comments are closed.

0
    0
    Your Cart
    Your cart is emptyReturn to Shop
        Scroll to Top

        Congratulations!

        You have reached our top status… Pro Solutions Platinum. Enjoy our best pricing.

        Free shipping applies to most orders over $99 in the continental U.S.

        Tax Exemption: If you have documents to prove exemption from your state sales tax, visit YOUR ACCOUNT and click on “Tax Exemption”.

        Contact Us

        Mon – Fri: 9am – 4:30pm MST

        Sat – Sun: Closed

        Online Contact

        Call (833) 228-5244

        Chat (coming soon)

        Your Active Discounts

        Discounts will be automatically applied to your cart.

        Free shipping applies to most orders over $99 in the continental U.S.

        Tax Exemption: If you have documents to prove exemption from your state sales tax, visit YOUR ACCOUNT and click on “Tax Exemption”.

        Contact Us

        Mon – Fri: 9am – 4:30pm MST

        Sat – Sun: Closed

        Online Contact

        Call (833) 228-5244

        Chat (coming soon)

        Quick Contact

        Expert advice comes standard

        Mon – Fri: 9am – 4:30pm MST

        Sat – Sun: Closed

        Online Contact

        Call (833) 228-5244

        Chat (coming soon)

        Manuals & PDFs

        Your local gas professional (plumber, HVAC, propane supplier, etc…) needs to know these requirements

        1. BTU rating of the burner 
        2. Fuel Pressure recommended at the Burner
          • Natural Gas: 7″ Water Column
          • Propane: 11″ Water Column

        Fuel Requirements

        Fuel = Flame

        Your local gas professional (plumber, HVAC, propane supplier, etc…) needs to know these requirements

        1. BTU rating of the burner (read more under “Gas Line Sizing”)
        2. Fuel Pressure recommended at the Burner
          • Natural Gas: 7″ Water Column
          • Propane: 11″ Water Column

        There are various pros/cons of Liquid Propane (LP) and Natural Gas (NG). The difference between LP and NG Warming Trends burners are the “jets”. If, down the road, you need to convert from LP to NG or vice-versa, you can do so by purchasing replacement jets from us at $25 each. 

        Propane – pros

          • Flexibility/portability
          • Opens up new location possibilities
          • Sometimes NG is not available

        Propane – cons

          • More expensive to burn than NG
          • Heavier than air, so it sinks down. This makes ventilation more important.
          • Requires refilling the tank
          • Hiding the propane tank can present new aesthetic challenges
          • Black soot tends to build up faster on fire media such as ceramic logs and cannonballs (it can be cleaned off)

        Natural Gas – Pros

          • Cheaper to burn; you probably won’t even notice an increase in your gas bill. Clients of ours have reported $0.25 – $0.75 per hour
          • You won’t run out, so burn to your heart’s content without the dreaded “we’re out of gas”
          • Since it’s lighter than air and rises, there’s less likelihood of unwanted fuel accumulation in the vessel
          • Slightly cleaner burning; less soot build up

        Natural Gas – Cons

          • Limited to what’s available in your area
          • May require upgraded meter or larger diameter fuel lines to provide adequate BTUs
          • The volume and pressure can be affected by other appliances
          • Might require a longer gas line, depending on where your fire feature will live  
          • Would be difficult to change the fire feature’s location after installation
          • Check the side of your gas meter for a BTU rating. Most commonly they are rated at 250K BTUs

        Even though the standard key valve inlet is 3/4″, you may need a larger gas line to span long distances.

        In order to get the proper volume and pressure of fuel, you need a gas line that is large enough in diameter to carry it sufficiently. For the most accurate assessment, consult a fuel professional. For a rough estimate, utilize our gas line sizing charts below. 

        *Make sure the BTUs from your line can supply at least 60-70% of what the burner is rated at. (At 60% capacity, your flame height may be more like 18″ high vs. 24″+ at full capacity.)

        Propane Gas Line Sizing Chart

        Natural Gas Line Sizing Chart

        Gas line sizing variables

          • Using angled couplings can reduce the volume/flow of fuel
          • Adding a 90 degree angle in your line adds the equivalent of 5 feet of distance
          • Running different sized lines over various distances is acceptable, but for maximum fuel volume, run larger lines over long distances
          • Number of appliances, whether it’s a dedicated line or not; all these factors play a role in volume and pressure
          • Pro Tip: if you haven’t installed your gas line yet, consider running it in conduit so that if you ever need to repair or change it, you won’t have to dig it up

        You can have great gas pressure, but if your line is too small, you may not get the desired flame. Think about it like filling up a swimming pool. If you reduce the nozzle size significantly, you may have a ton of pressure, but it’s going to take longer to fill up the pool. You need both pressure and volume to get a great flame. This is why the size of the gas line is so important. 

        Now that you understand the importance of volume (BTUs), let’s talk pressure. 

        Optimal Pressure for Crossfire burners:

        • LP: 11″ water column (w.c.)
        • NG: 7″ water column (w.c.)

        Water Column is the term used to measure pressure. There are 27.7 inches of water column pressure in 1 PSI of pressure. So 7″wc is about 1/4 PSI. This is the normal pressure that household natural gas is delivered.

        The device used to measure pressure of this type is called a Manometer

        Pressure too High? You may experience unwanted noise, usually a hissing sound. You might also find it difficult to dial in the desired flame height using the key valve.

        Pressure too Low? The flame will not be as tall and hot

        Location of Gas Stub

        • Most commonly the gas stub is positioned underneath the fire feature so that you don’t see it
        • It can be off-center or on-center, depending on the size of your fire feature
        • You may want to go off-center if you’re using electronic ignition
        • The key valve is generally located on the side of the fire pit, so if it makes sense for your build, place the gas stub off-center to reduce the distance of gas stub to key valve
        • Most often, the plumber will use hard pipe to connect from the gas stub to the key valve. However, if they decide to use a flexible line, most lines are 36″ long, so it makes sense to try and keep the gas stub within 36″ from the key valve location
        • Instruct the contractor to keep the gas stub as low as possible to make room for electronic ignition, or in the case that the plate sets fairly low
        • On some builds, the plate sits only 8″ off the ground

        You DO NOT need an air mixer with any of our burners. Air is mixed at each jet. 

        LP Regulators

          • For optimal regulation for burners over 250K BTUs, contact a local propane supplier
          • For regulators 250K BTUs or lower, purchase our REGULATOR KIT
          • From the tank, propane is HIGH PRESSURE, so it must be regulated down, because the burners are low pressure
          • For longer gas lines, we often use a high pressure (10psi) regulator at the tank end, and a “2nd stage” regulator on the other end of the line to bring the pressure to 11-13″wc

        NG Regulators

          • Consult a professional (plumber/HVAC)

        Standard 20lb Tank

        • A standard 20lb/5 gallon BBQ propane tank can be used for burner systems 180K BTUs and under
        • The Canyonlands Fire Table is a complete unit that can have a self-contained propane tank
        • Burn time varies from 6-12 hours, depending on how hot you run it
        • Results may vary, and it is common for the fuel to “freeze up” with burners 180K BTUs and up. What that means is that after 45 minutes or so, the flame only goes to about half. Remedy this by using two tanks connected together

        40lb Tank

        • This is a better option for most of our burners from 100K to 200k BTUs
        • It will give you longer burn times
        • Still relatively small and easy to move

        High Volume Tanks

        • Contact your local propane supplier

        Hiding the Tank

        • You can always run a larger diameter line and hide the tank in an inconspicuous location
        • You can purchase 20lb propane tank covers that make hiding the tank a cinch

        Gas Consumption

        • All of our burners burn with incredible efficiency due to the engineered jets. They mix fuel and oxygen at the flame which makes it taller, brighter, and hotter using less fuel
        • Read all about how much fuel you might be burning at full capacity – Learn More

        Compliance with the following standards:

        • ANSI Z21.97/CSA 2.41 Outdoor Decorative Gas Appliances
        • The burner system is certified nationally, however, it is up to the customer or contractor to verify local requirements

        Certified Burners

        Massachusetts

        Effective May 5, 2021 over 100 Warming Trends CROSSFIRE burners will be approved for use in Massachusetts. 

        All gas products approved for use can be found on the Massachusetts Consumer Affairs and Business Regulation (OCABR) website: Office of Consumer Affairs and Business Regulation (OCABR). To confirm the approval of a product, simply:

        1. Visit the OCABR website.
        2. Select “Product Information” from the drop down, then click “Go.”
        3. Enter Product information.
          1. Select “Gas” 
          2. Manufacturer: Warming Trends, LLC
          3. Model Number: Enter the burner type and BTU output (i.e. CFB180, CFBT290, CFBO140) If you do not have the model information, you may search using only the manufacturer name to bring up all Warming Trends burners that are accepted. 

        Click “Find Products” and see the listing of accepted products. 

        Canadian Customers

        Most metropolitan areas in Canada will require an automatic shutoff for fire pits over 65K BTUs in order to get a permit or certification.

        • Our Premium Electronic Ignition system has the proper fuel and flame censors to automatically shut down the fire when needed. Combine it with a dial timer to increase safety and ease. 
        • You can still purchase higher BTU burners without the premium ignition, and we will ship it with a fitting that limits the burner to 65K BTUs in the case that you’d like to have it certified.


        Plates & Pans

        Do you need one?

        The main purpose of the plate or pan is to hold in the media (lava rock, glass, etc). It also acts like the hood of a car, in that it can be lifted up and out in order to access the gas line or key valve underneath. The plate/pan makes installation easier as well.

        What’s it made of?

        • Aluminum
        • Aluminum does not rust

        Is a plate/pan ALWAYS necessary?

        • No, in some cases a plate/pan is not necessary
        • You may decide to fill up the space with some gravel or lava rock and set the burner on that instead of a plate or pan
        • Using a plate/pan is the most convenient for installation and maintenance

        Plate (No Sidewalls)

        • Appropriate for most builds
        • Sidewalls are not necessary when the burner is in the common position- recessed 3-5 inches below the finished top
        • Use stacked cinder blocks, bricks, or pavers under the plate. This makes for a simple and sturdy plate mount

        Pans (2″ or 3″ Sidewalls. 2″ is Standard.)

        • If the top of your fire table overlaps, or encroaches into your opening, and its thickness is less than 3 inches, you may want a pan instead of a plate (since the pan has to be smaller than the smallest part of the inside diameter) 
        • The sidewalls help contain the fire media/lava rock

        Drop-In Pans (2″ or 3″ Sidewalls + 1″-2″ Lip)

        • Sometimes necessary if you plan on building a portable fire feature and aren’t able to stack up blocks under the plate
        • Bar-height or uncommon builds might benefit from a drop-in pan
        • You will see a brushed aluminum metal band on the top of your fire feature when you use a drop in pan
        • Drop-in pans are available as a custom order – CLICK HERE
        • We recommend 3″ sidewalls with a 1.5″ lip in most cases

        Does the plate attach to the burner?

        • In most cases, yes
          • When you order a package from us, most of the time it will come with a threaded piece welded on to the plate/pan
          • The burner screws onto it
          • It’s very simple to remove or attach the burner (righty-tighty, lefty-loosy… make sure to re-apply pipe dope/tape!)
        • It’s not required that the burner attaches to the plate/pan. You can set the burner directly on the plate/pan. This will reduce the height of the burner by 3/4″. This might be beneficial if you want to cover your fire feature with a flat cover

        There are many methods to mount a plate/pan inside your fire feature. We’re just going to tell you our favorite way to do things because… well, it has worked well so far! With that being said, these methods may not work in all situations, so put your problem-solving hat on and get creative.

        *Complete & RTF Systems:  you won’t need to worry about plate/pan mounting; they’re designed for simplicity

        Mounting the Plate/Pan

        • Consider stacking up cinder blocks, bricks, or pavers inside the fire feature cavity
        • Place the plate/pan directly on the blocks
        • Adjust the block height by either adding some fill, or by digging underneath
        • Most commonly, plates/pans are mounted 4″-5″ below the finished top of the fire feature

        Plate/Pan Depth

        • 4-5″ below the finished top is recommended
        • Recessing it deeper may make the fire seem smaller, and you won’t see the media as well
        • Recessing it to be more shallow can give it a “proud” look; where all the parts stick up high and make a statement. Though you may have to ‘mound’ the fire media up higher in order to cover the jets. It’s not a bad look, but you won’t be able to use a flat metal cover if that’s your desire.
        • The depth at which the plate sits is really up to you. Keep in mind, the burner sits 3″ high from plate to the tip of the jet

        If your fire feature is already built and you can’t use a standard sized plate, you have a few options:

        Cut your plate to size on-site

          • Use a jig-saw with metal blade, or a grinder wheel with cutoff
          • It’s 3/16″ aluminum and your cut doesn’t need to look pretty

        Make your plate bigger

          • Use concrete board to extend the size of the plate
          • Watch THIS VIDEO to get an idea

        Order a Custom Size

        *TIP: Give yourself about 1/2″ of space around the plate so that it’s easy to insert into the fire feature opening

        Determining What You Need

        (Recommended)

        Enables easy flame height adjustment as well as the ability to turn the gas on or off.  All flex lines are stainless steel and whistle free.

        FK1

        • For use with any 121K – 249K BTU Burner
        • Kit Includes: (1) 36” L x 3/4” Diameter Flex Line + (2) 3/4″ Flared Fittings + 3/4” Key Valve + 3” and 12” Key + 1/2” x 2” Nipple

        FK2

        • For use with any burner 300K+ BTU
        • Kit Includes: (2) 36” L x 3/4” Diameter Flex Lines + (4) 3/4″ Flared Fittings + 3/4” Key Valve + 3” and 12” Key + (2) 3/4” x 3” Nipple + (2) 3/4” Tee + (1) 3/4” x 1/2” MM Reducer Fitting
        FKM1 – Specific to the Mercury Ignition. Allows fuel connection from the ignition to the burner.
        • If the walls of your fire pit are thick, you may need this accessory
        • Closes the gap from the key valve to the decorative faceplate (escutcheon)
        • Can also be made onsite with hard pipe or sprinkler pipe to the length that you need

        Vent Kit

        Recommended Ventilation

        • 18 square inches on opposing sides (for cross-breeze)
        • Keep the vents lower towards the ground
        • Dimensions: 3 7/8″ x 12″

        Types of Ignition

        *NEW* Platinum Ignition System

        The Platinum Automatic Ignition System delivers superior quality, performance, and value. Expertly engineered, this innovative ignition has been designed and built to be the safest and most dependable way to light fire in both residential and commercial spaces.

        • Light your fire with the flip of a switch, remote, home automation, or dial timer.
        • Clean design with no need for any components to be attached to the outside of your fire feature.
        • Auto shutoff for the ultimate safety + fully certified.
        • Made in the U.S.A.
        • 680,000 BTUs of gas output 
        • Unique wind cage design that provides true protection to the pilot components from wind and rain.
        • Customized ignition settings allow for better performance and reduces cycling faults.
        • Robust components provide reliability and durability.
        • LED-based diagnostics provide quick and easy troubleshooting.
        • Design allows for field serviceability.
        • Coupled with the Warming Trends’ WATERSTOP™ fitting provides unmatched protection of the ignition from water and debris. 
        • Warranty: 3 years for residential, 1 year for commercial (burner must be covered when not in use or warranty is null and void)
        • Electrical is required
        • Commonly used is a standard 110 volt GFI outlet located underneath the fire pit
        • For product support, please contact Warming Trends at 303-346-2224

        Match Lit (Most Common)

        • To light, turn your fuel valve (most commonly a key valve supplied by us) to a low volume
        • Use a lighter or match to ignite the flame manually
        • Gradually turn up the key valve so that the other jets light
        • Not recommended for kids or VRBO/Rentals

        Push Button Ignition Kit + Mounting Bracket

        • Powered by a AA battery
        • Holds a key valve as well as button module
        • To light, turn the key and press spark button until lit
        • Will work with any size burner, but for large burners over 350,000 BTUs, we recommend the Platinum Ignition
        • The bracket allows for more mounting options
        • Can be used in place of a paver
        • Should be combined with a Key Valve/Flex line kit

        Dimensions of bracket:

          • Width: Adjustable 8″-12″
          • Height: 3 7/8″ 
          • Depth: 5″

        Push Button Battery Operated Control Module + Spark Igniter Rod and Wire

        • AA Battery operated
        • Spark rod is mounted to the plate
        • Spark rod must be within very close proximity to a jet on the burner
        • To light, turn the key valve (separate product) to get gas flow going and press button until spark ignites the fuel
        • Without a mounting bracket, the button most commonly mounts to a metal fire pit

        24 Volt Spark Ignition System – High Capacity: Spark Igniter + Control Module + 24 Volt Transformer + up to 400K BTU

        • Requires electrical
        • Comes pre-installed under the burner plate for easy drop-in installation
        • Must be covered when not in use
        • Can be used with any type of electrical switch, timer, remote, or home automation
        •  Turns fire on/off, does not adjust flame height
        • Recommended: add the Key Valve/Flex Kit if you want flame height adjustability

        If your climate is damp or windy, you may consider the hot surface ignition instead

        electronic ignition for fire pit

        Hot Surface Igniter with Dual Pilot Tubes + 50VA/24VAC Transformer 

        • Requires electrical
        • Comes pre-installed under the burner plate for easy drop-in installation
        • Must be covered when not in use
        • Can be used with any type of electrical switch, timer, remote, or home automation
        • Great for lighting in damp or windy conditions
        • Standard Capacity Version: Up to 290K BTUs
        • Max Capacity Version: Up to 780K BTUs
        •  Turns fire on/off, does not adjust flame height
        • Recommended: add the Key Valve/Flex Kit if you want flame height adjustability

        If your climate is damp or windy, this is the BEST ignition option

        Mercury Ignition (Battery Powered)

        Mercury Ignition Spark Igniter with Internal Safety Shutoff + 3 FT Pilot for use up to 240K BTU

        • Added safety of auto fuel shutoff
        • Great for commercial spaces or if non-homeowners desire to light the fire
        • Pilot assembly comes pre-mounted to the plate
        • Only available with burner and plate combo orders or the Venture Series
        • No key valve required
        • View INFORMATION PDF

        SPRING SALE

        Free Cover + Lava Pebbles with Venture and Arbor Collections!

        Subscribe and Receive 5% off your first order

        +Free Nationwide Shipping

        This field is for validation purposes and should be left unchanged.

        By signing up, you agree to receive occasional emails from Montana Fire Pits. You can unsubscribe anytime by clicking the link at the bottom of an email. 

        Prices are Changing

        Beginning February 1st, 2023

        Prices for our products will increase about 3% starting on February 1st. As always, with Montana Fire Pits you’ll enjoy:

        • Products made in the U.S.A
        • Highest quality materials and design
        • High customer satisfaction ratings
        • The best fire in the industry

        Thank you for considering Montana Fire Pits!

        MFPbadgeColor

        Lead Times & Shipping

        Updated

        Lead Times

        Transit time not included. Expect 1-2 weeks for the shipment to arrive.

        Shipping Costs

        Please add products to your cart and enter your address at checkout to see detailed shipping costs

        *Free Shipping: Applies to most orders over $99 in the continental U.S. with the following exceptions:

        • Burners over 50″: $279.00

        **Shipping to Canada: You may be charged additional border fees and taxes when you receive your product. Montana Fire Pits is not responsible for those fees.

        **Please add products to your cart and enter your address to see more information on shipping costs to Canada, Hawaii, and Alaska

        Sales Tax Applies to the Following States:

        California, Washington, New York, Utah, Colorado, New Jersey, Illinois, Texas, Virginia, Georgia, Arizona, Idaho, North Carolina, Minnesota, Massachusetts, Florida

        Our burners and fire features are hand-made in the U.S. and good things take time. These lead times are based on our best estimates and are updated weekly. Thank you for your patience as we strive to ship your fire gear as fast as possible. 

        []