
Building a gas fire pit in your backyard can alter your outdoor space into a place for relaxation and hosting family and friends. However, before you start digging and assembling, it’s essential to understand the key dimensions and technical specifications that will ensure a safe and enjoyable experience. This outline for gas fire pit dimensions and construction will equip you with the knowledge needed to construct a fire pit that perfectly complements your needs and backyard patio aesthetics.
Size and Placement
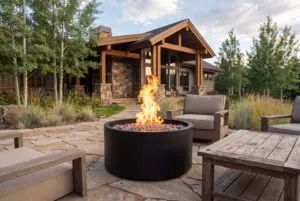
The size of your fire pit will depend on several factors, including the available space in your backyard, the average number of people you intend to gather around it, and the overall feeling you wish to create. Fire pits come in all shapes and sizes. For round fire pits, popular opening sizes range from a cozy 18″ for intimate gatherings to a sprawling 60″ for larger crowds. Square fire pits offer more flexibility, often using the burner plate as a guide for dimensions.
Pro tip: Always add an extra half inch to an inch to your opening to ensure the burner plate fits properly.
- Common Dimensions: Round fire pits typically range from 18″ to 60″ in diameter, with standard sizes increasing in 6″ increments. Square or rectangular fire pits offer more design flexibility and are often based on the burner plate dimensions.
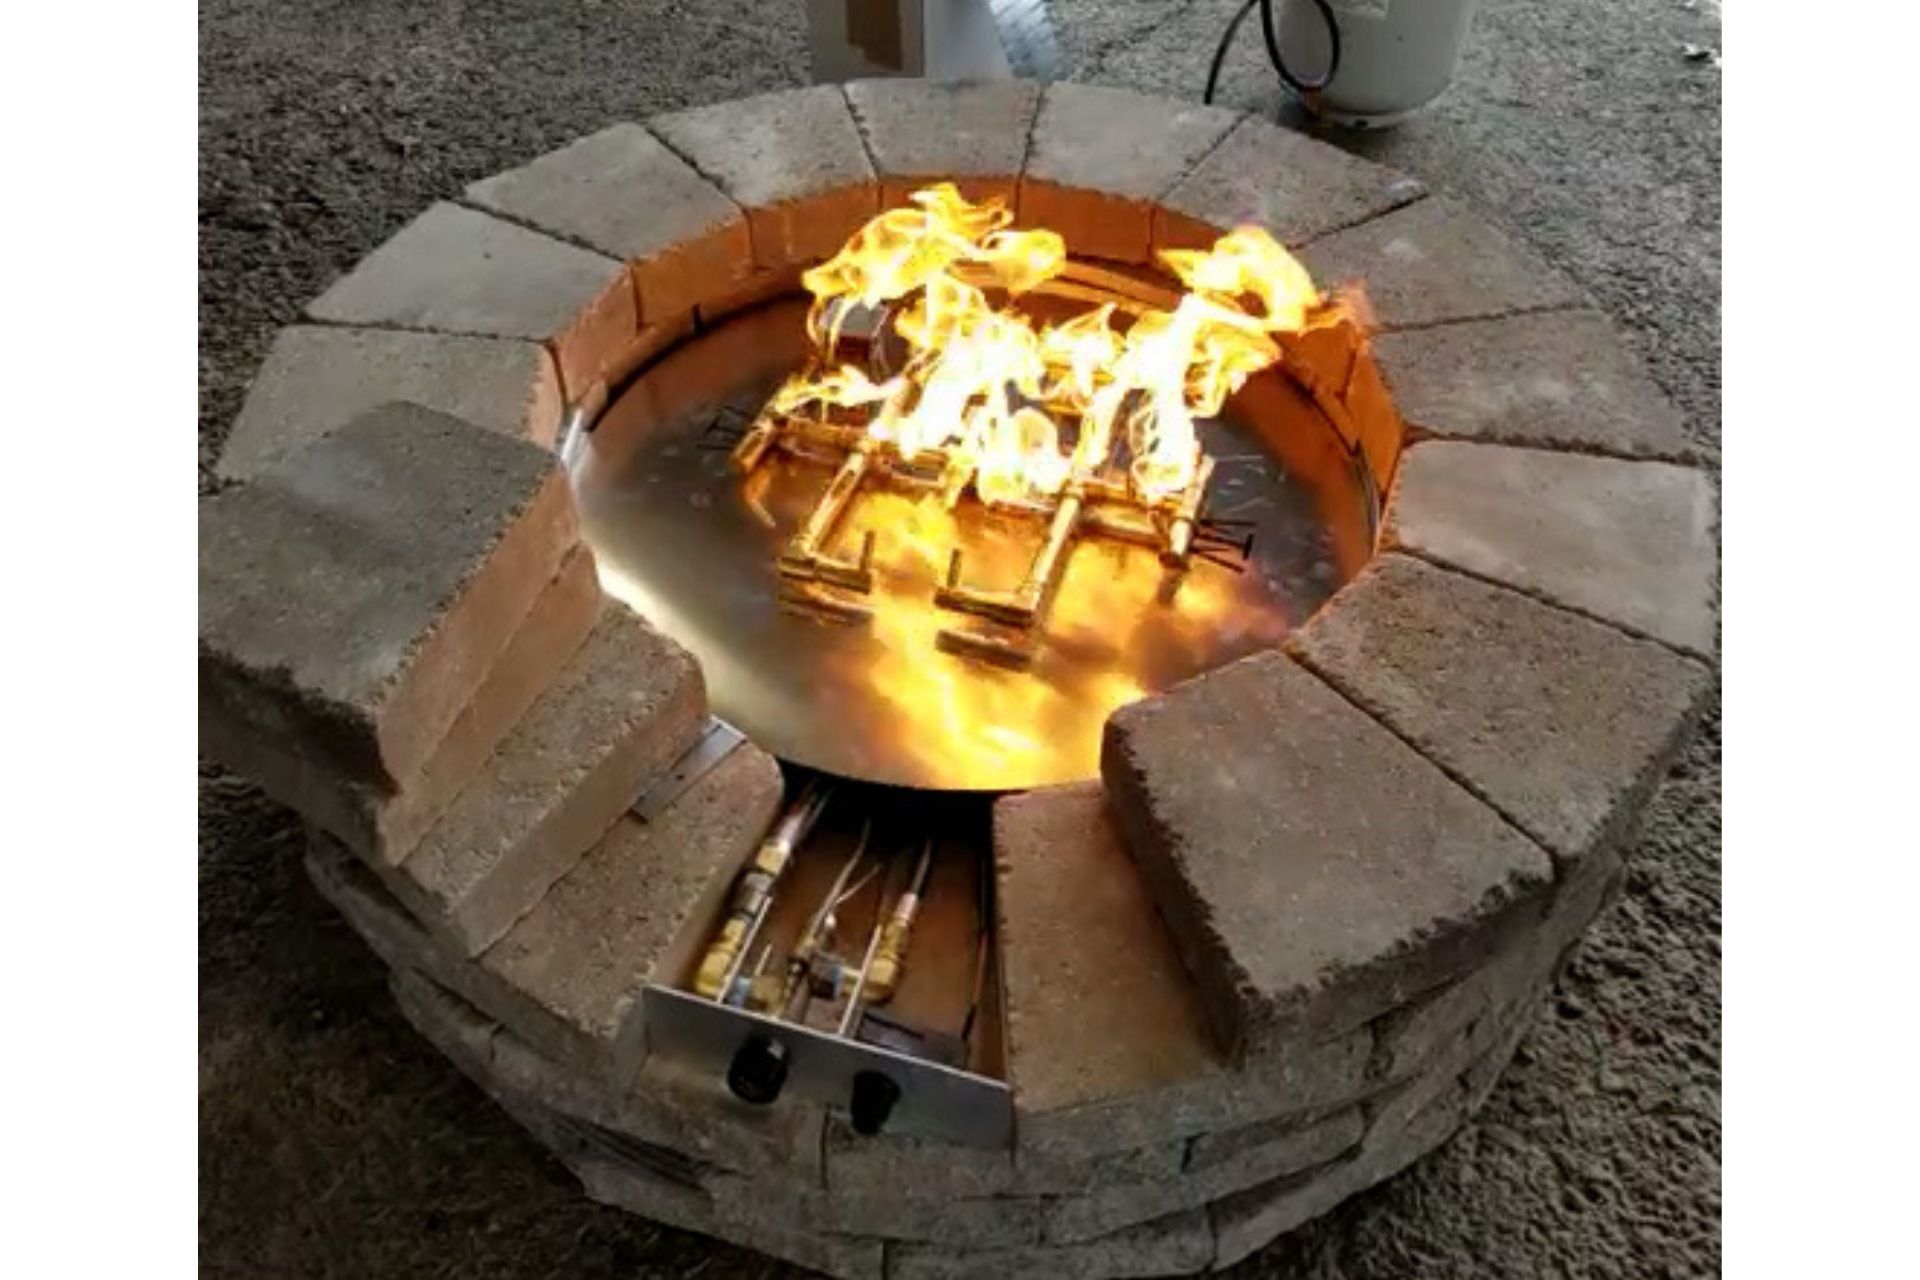
- Burner Pan: The pan houses the burner and is crucial for heat distribution. Choose a pan size that complements your desired fire pit opening, allowing for a buffer zone of at least 6″ between the burner and the fire pit edge.
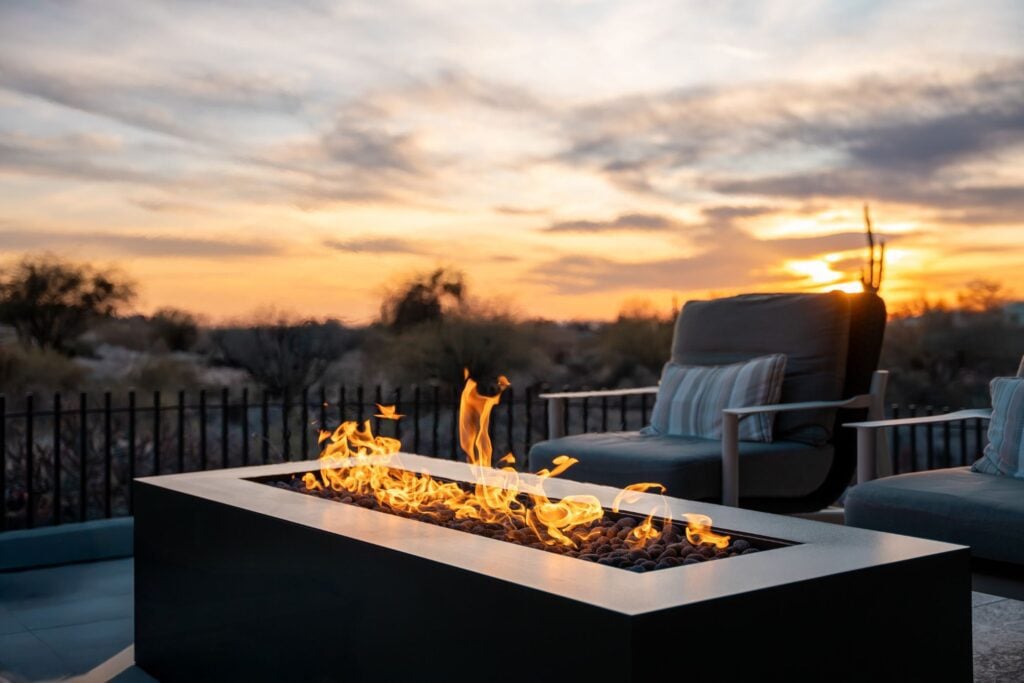
When it comes to installing the burner plate, aim for a depth of 3″ to 5″. This ensures proper airflow and efficient heat distribution for those picture-perfect flames. The overall finished height of your fire feature, including the surrounding structure, should ideally be around 16″-18″ for easy access and visual appeal.
- Top Ledge to Fire: Maintain a 5″-6″ gap to prevent overheating the surrounding materials.
- Combustible Walls/Structures: A minimum of 36″ clearance is crucial to prevent fire hazards.
- Combustible Ceiling/Overhang: Ensure at least 10′ of clearance, especially for covered patios or overhangs.
Visualizing these distances is key.
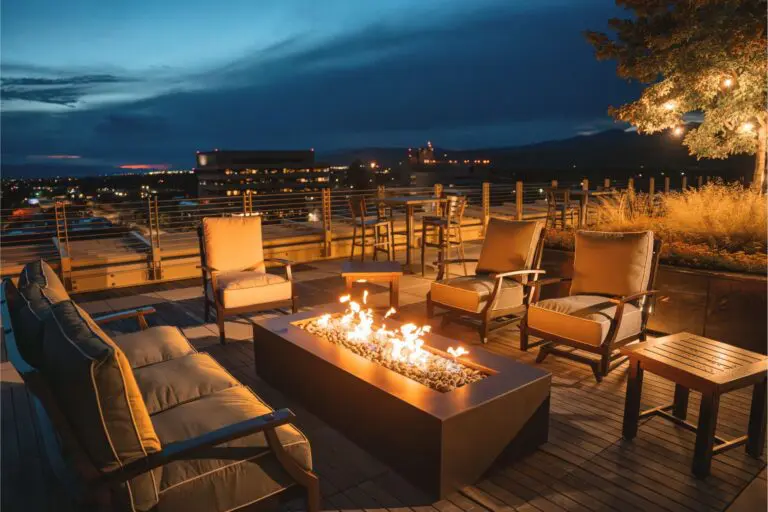
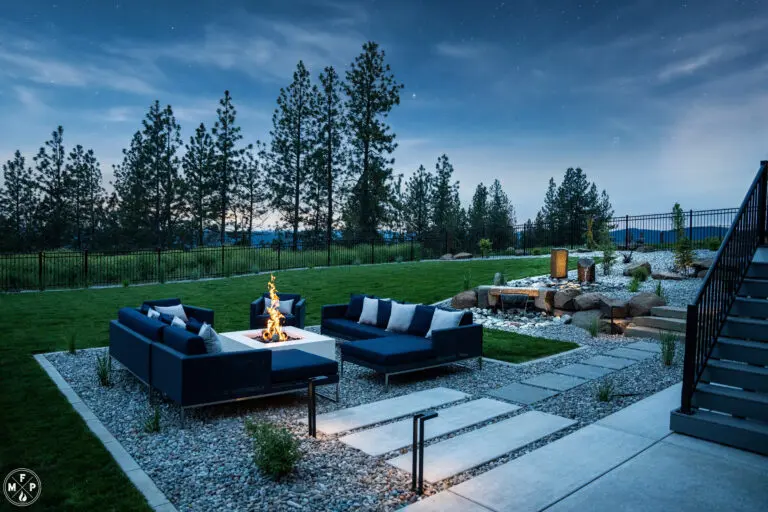
Creating a Comfortable and Functional Space
The area surrounding your fire pit is just as important as the fire pit itself. Think about how you’ll use your fire pit. A comfortable ledge is crucial for resting drinks, putting your feet up, and enjoying the warmth of the fire. Aim for a ledge width between 7″ and 12″ to provide ample space and comfort.
When planning the seating arrangement around your fire pit, consider a distance of 22″ to 24″ from the fire pit edge. This provides a comfortable distance for conversation and warmth without being too close to the flames.
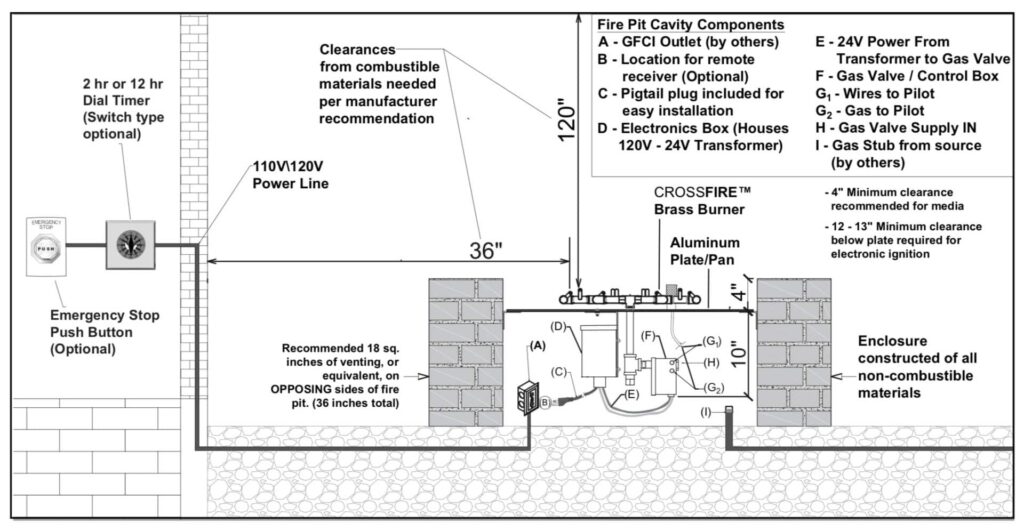
Burner and Gas Line Specifications
Selecting the right burner and gas components is crucial for your fire pit’s performance and safety. Start by choosing a burner with a BTU (British Thermal Unit) output that matches your desired flame height and heat output. Consider factors like the size of your fire pit and how much heat you want it to generate. Our Crossfire Burners by Warming Trends are made from durable materials like brass.
Next, it’s essential to get the gas line sizing right. Consult a qualified gas professional to determine the correct size for your specific burner. Most residential fire pits use a ¾” gas line, but larger burners with higher BTU outputs may require a larger line to ensure adequate gas flow. This will prevent issues like low flame height or inconsistent burner performance.

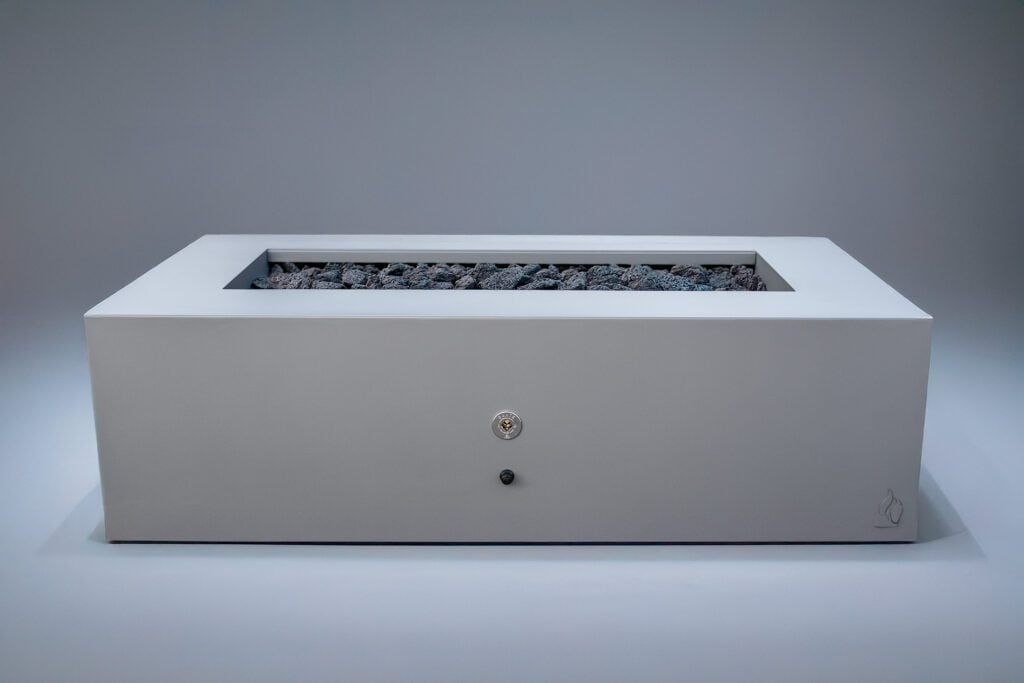
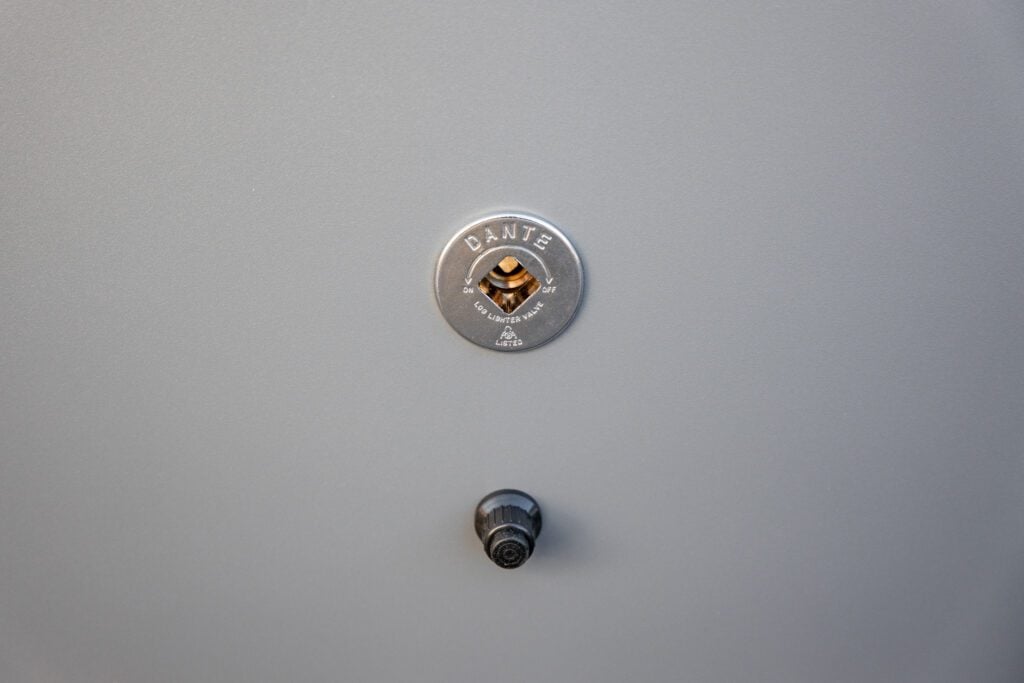
Finally, familiarize yourself with the key components of a gas fire pit system. A ¾” key valve is standard for most installations, allowing you to easily turn the gas supply on and off and adjust flame height. A flexible gas line, usually ¾” x 36″, connects the key valve to the burner, providing flexibility in positioning. A 3/4″ flex line can carry up to 255,000 BTUs, so if your burner requires more fuel, you’ll want a dual flex line kit. And lastly, the regulator ensures the correct gas pressure is maintained for optimal and safe burner operation. Propane setups require a regulator, but not all natural gas installations do. Consult your local plumber for more information.
Fueling Your Fire
Natural gas offers a convenient and continuous fuel source for your fire pit, but propane provides greater flexibility, especially for portable or tabletop models. When selecting a gas burner, consider the BTU output, which determines the flame height and heat output.
If you opt for propane, a standard 20lb tank will typically fuel a burner up to 180k BTUs for 8-10 hours (depending on how high you set the flame). For larger burners, consider a 30lb or 40lb tank, or a high-volume tank for extended use. Remember that propane fire pits require adequate ventilation, especially in enclosed or partially enclosed spaces.
Building Your Fire Pit
- Gather your materials: This includes a fire pit kit, burner package, pavers, lava rocks, fire glass, and any desired decorative elements. Or you could simply purchase a complete fire system.
- Choose a level location: Ensure the location is away from any combustible structures and adheres to the safety clearances outlined earlier.
- Prepare the base: Dig your pit and add a base layer of sand or gravel for drainage if desired.
- Install the components: Install the fire pit burner, add lava rocks or pebbles, and then carefully position the burner pan at the correct depth (3″-5″).
- Connect the gas line: Ensure all gas connections are secure and leak-free. Consult a professional.
Don’t Forget the Details
Don’t forget the finishing touches that enhance both the look and functionality of your fire pit! It’s best to use lava rock as a base layer, filling the fire pit opening to a depth of about 3 inches. This porous rock is excellent for drainage and helps distribute heat evenly.

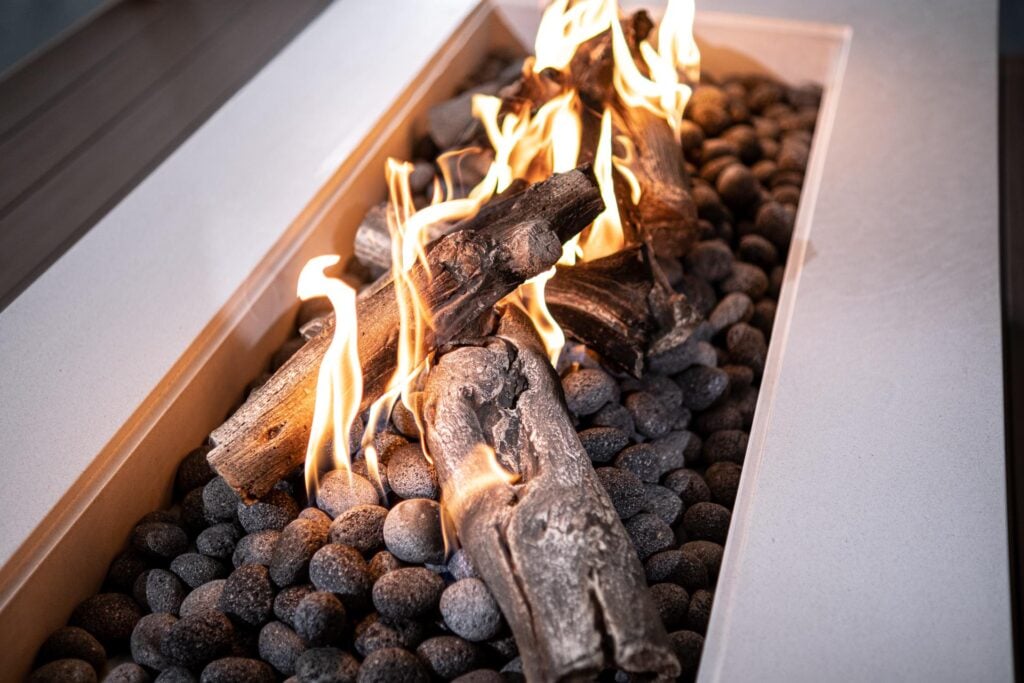
For added visual appeal, consider adding a layer of fire glass on top of the lava rock. This comes in a variety of colors and adds a touch of sparkle and shine. Fill the opening with fire glass to a depth of about 2 inches. If you prefer a more natural look, ceramic logs are a great option. They come in various sizes and sets to fit your fire pit opening and provide a realistic wood-like appearance without the mess of actual wood. Avoid placing ceramic, cement, or steel options on top of glass, as it will cause the glass to melt.
By following these guidelines and paying close attention to the dimensions, clearances, and gas line specifications, you can confidently build a gas fire pit that will provide warmth, light, and countless hours of enjoyment in your backyard. Remember to always consult local building codes and manufacturer instructions for specific installation requirements and safety precautions. Now, go forth and ignite your backyard dreams!


Aluminum: the vessel material that earns its place
Fire features have become a standard expectation in premium outdoor design. Clients want them. Architects draw them in. And as the contractor, you’re the one who has to make the vision actually work — with real gas lines, real installation conditions, and a real client standing by.
The Yellowstone Edge Is Here
The Venture Series · 2026 Release The Yellowstone Edge does not ask for attention. This is the newest addition to The Venture

Mild steel, corten, or marine-grade aluminum: choosing the vessel for a fire table built to live outside
Every Montana Fire Pits gas fire table, from the Venture Series to the Studio Series and even the Arbor Collection can be